Configuring MCP Server
Prerequisites
Before proceeding, you must have an existing connector with the relevant queries already configured. For detailed instructions, refer to the Connector Queries Documentation.
Step 1: Locate the MCP Server Add-on
To begin configuring the MCP Server:
- From the DronaHQ console screen, navigate to the Add-ons section located in the left-hand navigation pane.
- Locate the MCP Server add-on and click on it to open the interface.
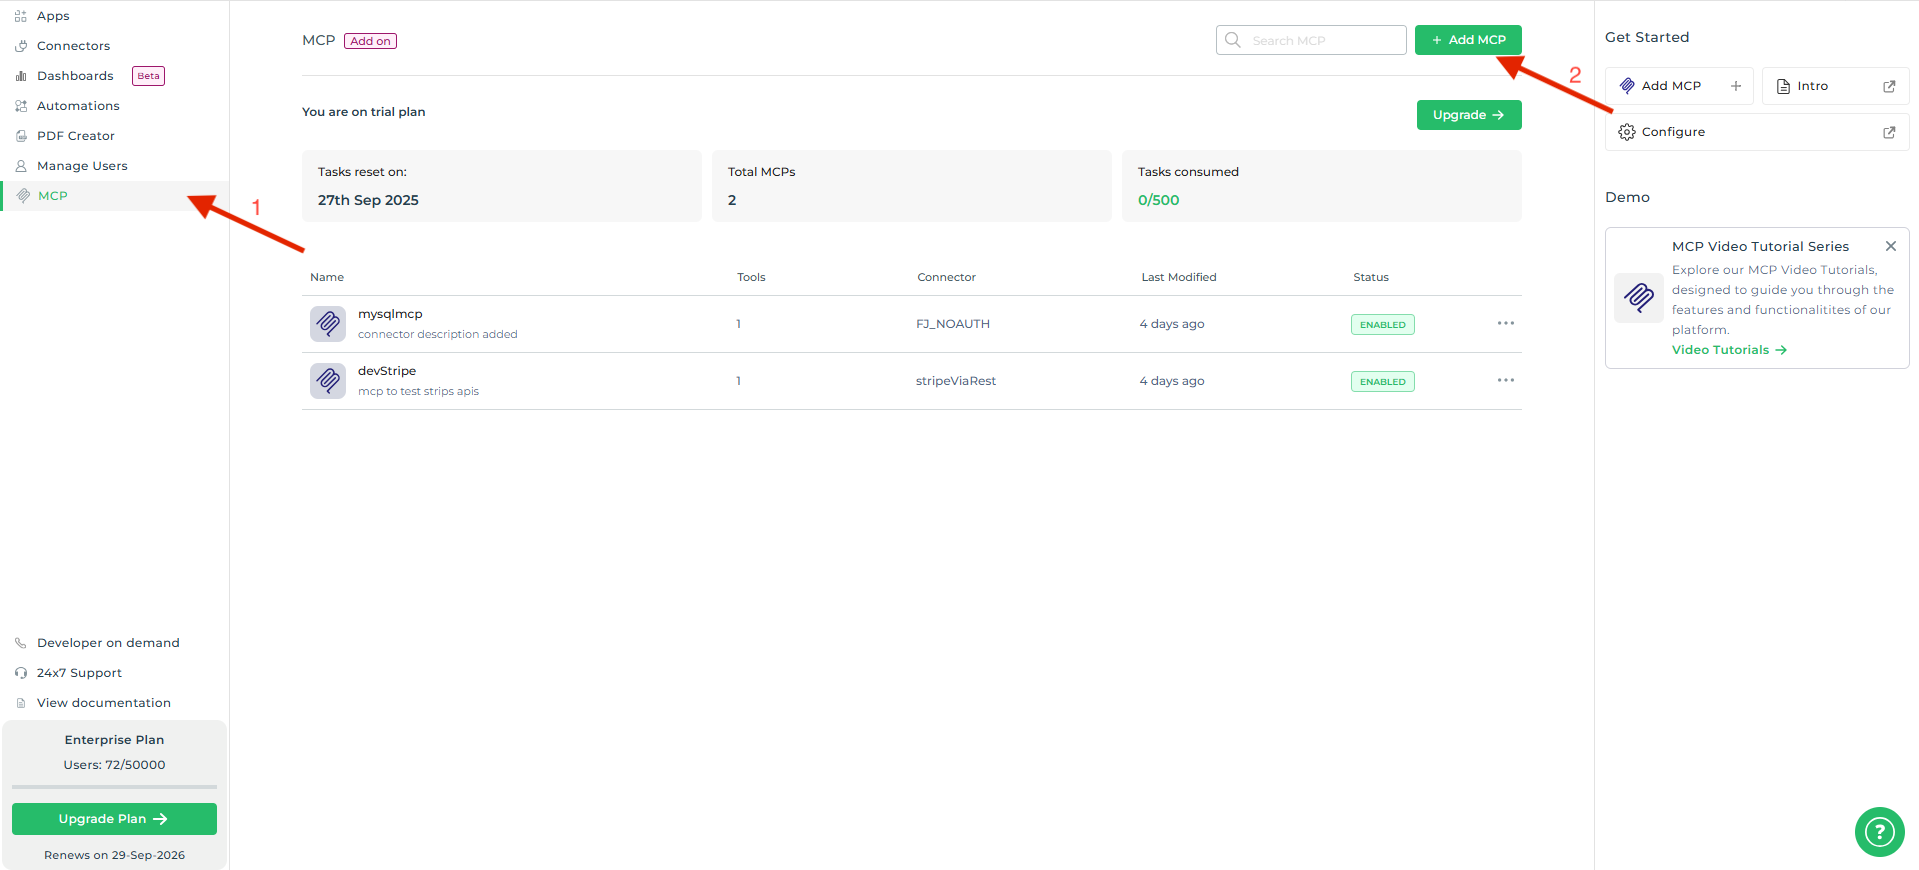
Step 2: Add a New MCP
Once the MCP Server add-on is open:
- Click on the Add MCP button.
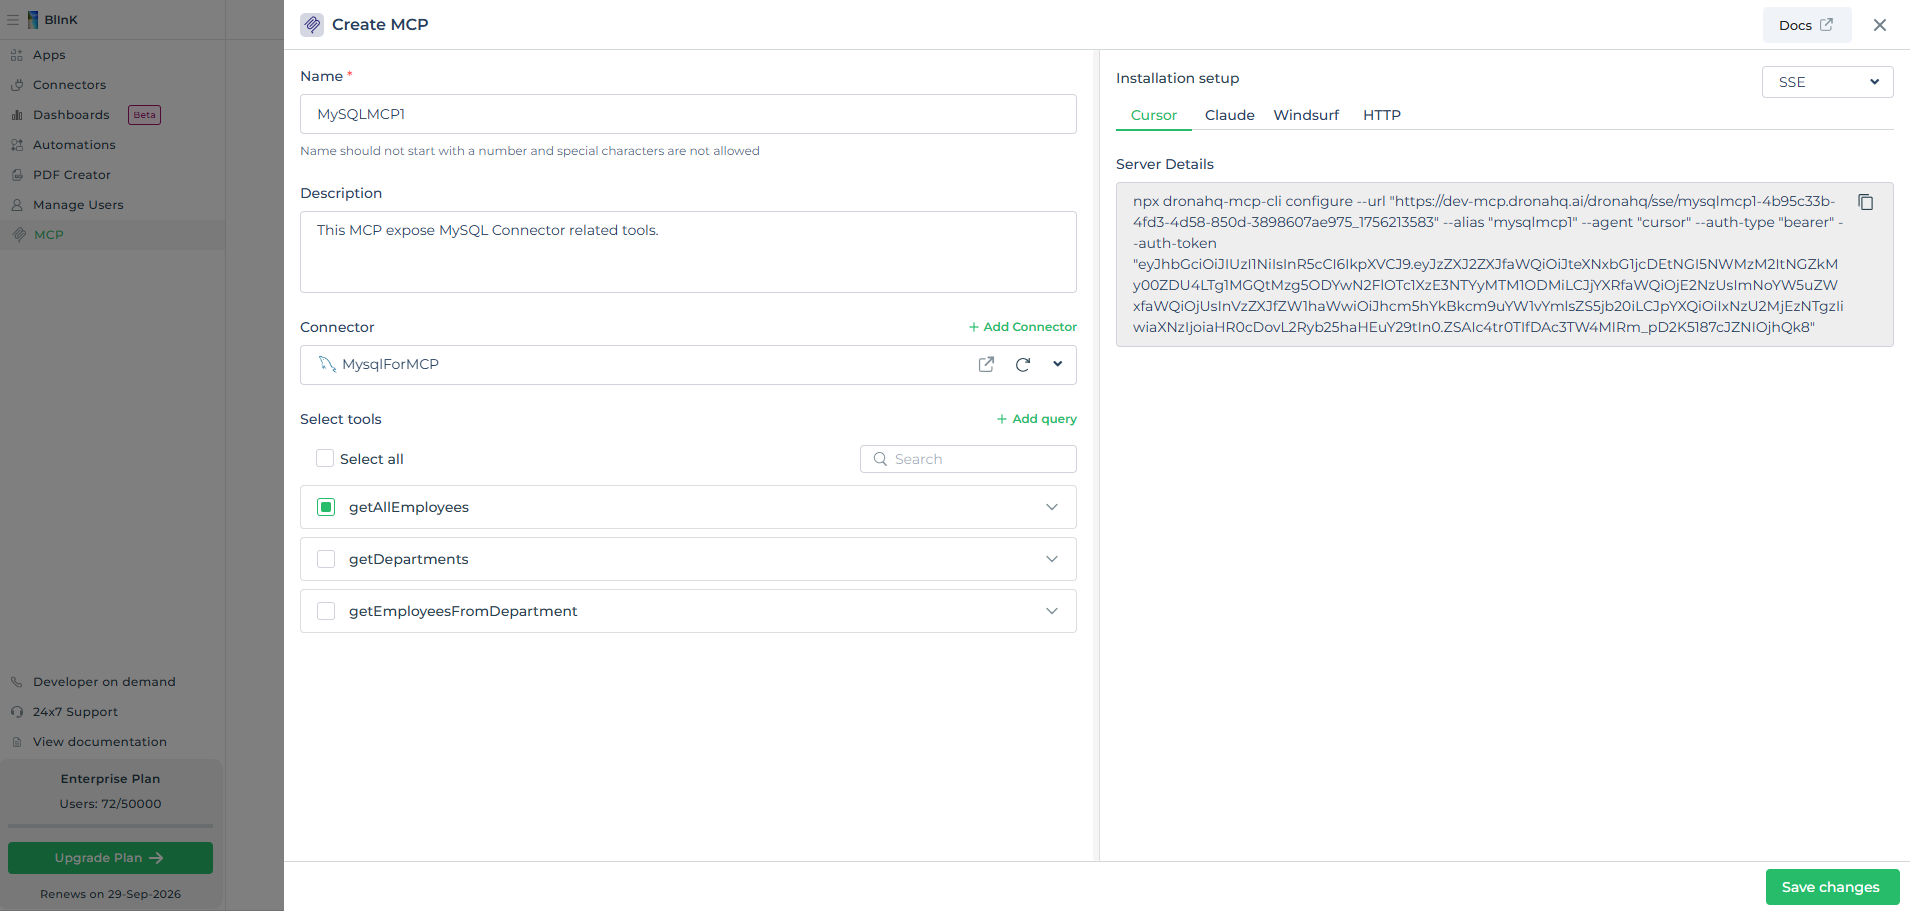
- A configuration window will appear. Fill in the required details as outlined below:
| Field | Description |
|---|---|
| Name | Provide a descriptive name for your MCP (e.g., Slack-Message-Sender, Salesforce-Data-Lookup). |
| Description | Include a brief summary of the MCP's functionality to aid in future identification. |
| Connector | Select the connector you wish to expose. If a connector has not been set up, refer to the connector setup documentation. After selecting a connector, choose the specific queries you want to expose via this MCP. |
note
If you are using a newly created connector, ensure that the required queries are defined within it before exposing them through the MCP.
- Click Save to create the new MCP.
Next Steps
Your newly created MCP Server will now be available for installation and use by AI agents like Claude, Cursor and Windsurf, enabling them to execute the actions defined by the selected queries. For installation, head over to documentation